
This guide explains how to set up a crypto hardware wallet, allowing you to store and manage your cryptocurrencies securely offline. Designed for beginners and intermediate users, following these steps ensures your funds are protected from online threats. You will learn how to initialize the device, generate recovery phrases, and prepare for safe usage.

Tangem Crypto Wallet Pack of 2 – Cold Storage Hardware Wallet for Bitcoin, Ethereum, NFTs & Altcoins
- ✔ Number of Wallets: 2
- ✔ Supported Blockchains: 90
- ✔ Supported Coins & Tokens: 14,100+
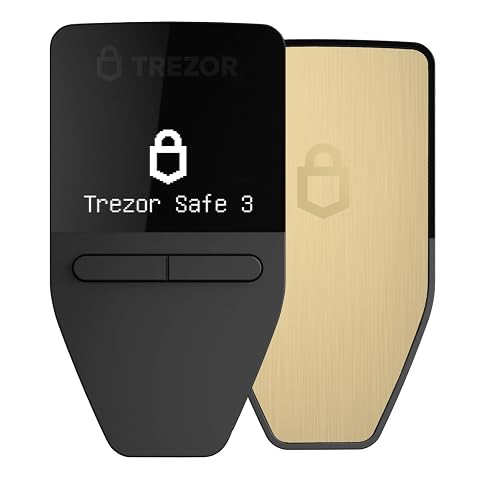
Trezor Safe 3 Passphrase & Secure Element Protected Crypto Hardware Wallet
- ✔ Security: EAL 6+ Secure Element
- ✔ Display: OLED screen
- ✔ Supported Assets: Thousands of coins including Bitcoin and Ethereum

Ledger Nano X Crypto Wallet Signer – Bluetooth Enabled, Onyx Black
- ✔ Connectivity: Bluetooth
- ✔ Compatibility: iOS
- ✔ Supported Coins: 15,000+ coins & tokens
Difficulty: Beginner | Time: 20-40 minutes
What You’ll Need
Tools & Materials:
- Hardware wallet device (e.g., Ledger Nano S, Trezor, or similar)
- A computer or smartphone with internet access
- USB cable or Bluetooth (depending on device)
- Paper and pen for recovery seed backup
Knowledge:
- Basic understanding of cryptocurrency concepts
- Familiarity with device setup procedures
Ensure your hardware wallet is purchased from an official source to avoid tampering. Have a clean, secure environment ready for setup. Do not connect the device to shared or infected computers.

TANGEM Crypto Wallet Pack of 2 – Trusted Cold Storage Hardware Wallet for Bitcoin, Ethereum, NFTs & Altcoins – 100% Offline Crypto Cold Wallet
Proven security at scale: Over 9 years and millions of cards issued with no known remote hacks, while...
As an affiliate, we earn on qualifying purchases.
Tangem Crypto Wallet Pack of 2 – Cold Storage Hardware Wallet for Bitcoin, Ethereum, NFTs & Altcoins
The Tangem Crypto Wallet Pack of 2 stands out for its military-grade security, waterproof and shockproof design, and support for over 14,100 coins across 90 blockchains. This makes it ideal for long-term storage and users who need rugged, offline protection. Compared with the other options, Tangem’s physical durability and waterproof features mean it can withstand harsh conditions, but it requires familiarity with managing hardware wallets, especially since it offers no built-in seed phrase backup. It’s best suited for those who value longevity and security over convenience or quick setup.
Pros:
- Military-grade security with EAL6+ chip
- Supports a vast range of cryptocurrencies, NFTs, and DeFi tokens
- Waterproof and shockproof, engineered for longevity
- No cables or batteries needed, easy management
Cons:
- Requires familiarity with crypto hardware management
- No included seed phrase for backup (optional feature)
- Limited to offline hardware, less suited for daily quick access
Best for: Crypto holders prioritizing offline security and durability for long-term storage
Not ideal for: Beginners seeking a simple, plug-and-play setup or users preferring software wallets
Bottom line: A rugged, highly secure choice for long-term crypto storage, especially in harsh environments, but less convenient for daily use.
“A rugged, highly secure choice for long-term crypto storage, especially in harsh environments, but less convenient for daily use.”

Trezor Safe 3 - Passphrase & Secure Element Protected Crypto Hardware Wallet - Buy, Store, Manage Digital Assets Simply and Safely (Solar Gold)
Unparalleled Security: Protect your assets NDA-free EAL 6+ Secure Element, offering robust defense and complete transparency
As an affiliate, we earn on qualifying purchases.
Trezor Safe 3 Passphrase & Secure Element Protected Crypto Hardware Wallet
The Trezor Safe 3 excels in combining high-level security with approachable design. Its EAL 6+ Secure Element protects your private keys, while the OLED screen allows for easy transaction verification. Setup is straightforward, taking roughly 15 minutes, and it seamlessly integrates with Trezor’s intuitive Suite app. This makes it a top choice for users who want strong security, flexible backup options, and a manageable learning curve. Compared to the Ledger Nano X, Trezor’s dedicated backup solutions and clear interface make asset recovery simpler, but it may lack some of the Bluetooth convenience that others offer.
Pros:
- High security with EAL 6+ Secure Element
- Supports thousands of cryptocurrencies
- Easy setup with an OLED display
- Enhanced backup options for secure recovery
Cons:
- Initial setup takes about 15 minutes
- Limited details on mobile app features
- Price not explicitly specified
Best for: Users seeking high security with easy management and reliable backups
Not ideal for: Those who prefer wireless management or need quick setup without detailed configuration
Bottom line: A secure, user-friendly wallet ideal for those who want high security without sacrificing ease of use or backup options.
“A secure, user-friendly wallet ideal for those who want high security without sacrificing ease of use or backup options.”
Amazon Product B07M6R4NK3
As an affiliate, we earn on qualifying purchases.
Ledger Nano X Crypto Wallet Signer – Bluetooth Enabled, Onyx Black
The Ledger Nano X is renowned for its Bluetooth capabilities, allowing wireless management of your crypto assets via iOS devices. It supports over 15,000 coins and tokens, making it one of the most versatile wallets on the market. Its Bluetooth feature offers convenience for mobile users, and the genuine check backup signer enhances security. However, the product’s physical design—particularly its black finish—requires careful handling to avoid scratches, and wireless connectivity can introduce security considerations if not managed properly. Nonetheless, for active traders and those who prioritize mobility, this wallet provides unmatched flexibility.
Pros:
- Supports over 15,000 coins and tokens
- Bluetooth connectivity for wireless management
- Secure backup signer with genuine check
- Long battery life for hours of use
Cons:
- Product color may vary slightly from images
- Requires careful handling to prevent scratches
- Wireless connection may pose additional security considerations
Best for: Crypto users wanting wireless access and extensive coin support on iOS devices
Not ideal for: Those preferring wired connections or concerned about physical wear and tear
Bottom line: An excellent choice for mobile, active crypto users who want broad support and wireless convenience, with some care needed in handling the device physically.
“An excellent choice for mobile, active crypto users who want broad support and wireless convenience, with some care needed in handling the device physically.”
As an Amazon Associate we earn from qualifying purchases.
Before You Start
Disable any screen recording or camera recording devices nearby. Prepare a quiet, private space to prevent others from seeing your seed phrase. Confirm your device is fully charged or connected to power if applicable.
Step-by-Step Instructions
Step 1: Unbox and connect your hardware wallet
Remove your hardware wallet from its packaging. Connect it to your computer using the provided USB cable or pair via Bluetooth if supported.
Tip: Check for any signs of tampering on the packaging before opening.
Check: Device powers on and displays a welcome or setup screen.
Step 2: Initialize the device and select language
Follow on-screen prompts to select your preferred language and agree to any terms of use.
Tip: Use the device’s buttons or touchscreen to navigate; avoid using untrusted computers for setup.
Check: Device displays options for creating or restoring a wallet.
Step 3: Create a new wallet and generate recovery seed
Select ‘Create New Wallet’ and follow prompts to generate a recovery seed phrase. Write down the seed phrase carefully on paper, in the exact order, and keep it secure.
Tip: Do not store the seed digitally or share it with anyone. Verify each word as prompted.
Check: Device confirms your seed phrase matches what it generated. You can proceed to wallet setup.
Step 4: Verify your recovery seed
Follow the prompts to confirm your seed phrase by selecting or typing each word in order on your device.
Tip: Double-check spelling and order to prevent future recovery issues.
Check: Device confirms your seed phrase is verified successfully.
Step 5: Set a PIN or passphrase
Choose and confirm a PIN or passphrase for device security. Do not use simple or easily guessed PINs.
Tip: Use a unique, strong PIN; avoid common patterns.
Check: Device accepts and stores your PIN, prompting for it at each startup.
Step 6: Install and configure wallet software
Download the official companion app or software recommended by your device manufacturer. Connect your hardware wallet to the software following instructions, and set up your wallet interface.
Tip: Use official sources to avoid malware. Keep software updated.
Check: Wallet software detects your device and displays your account balance or wallet address.
Common Mistakes to Avoid
- Writing down the seed phrase incorrectly or storing it insecurely. — Double-check each word during backup and store the seed in a secure, offline location.
- Connecting the device to untrusted computers or networks. — Always connect your hardware wallet to your own device and avoid public or shared computers.
- Sharing seed phrase or recovery information with others. — Never disclose your seed phrase. Treat it like cash or a password.
Troubleshooting
Problem: Device not powering on or recognized by the computer.
Solution: Check the USB connection, try a different port, or replace the cable. Ensure your device is charged or powered.
Problem: Unable to verify seed phrase or seed phrase mismatch.
Solution: Carefully re-enter the seed phrase and verify spelling. Confirm you are using the correct seed words.
Problem: Software does not detect the hardware wallet.
Solution: Update the wallet software, restart your computer, and reconnect the device. Confirm drivers or permissions are correctly set.
What Success Looks Like
The hardware wallet displays a secured dashboard or balance, and you can generate new addresses or send transactions from the wallet software. The seed phrase is correctly written and stored offline, and the device prompts for PIN or passphrase at startup.
Next Steps
Regularly update your device firmware and wallet software. Backup new recovery phrases if you generate additional wallets. Use your hardware wallet for all transaction signing, never exposing private keys online. When not in use, disconnect and store your device securely.
Frequently Asked Questions
Can I use multiple cryptocurrencies on one hardware wallet?
Yes. Most hardware wallets support multiple coins through compatible wallet apps. Follow device instructions to add and manage different cryptocurrencies.
Is it safe to connect my hardware wallet to a smartphone?
Yes, if your device and wallet app are official and secure. Use trusted apps and avoid unverified software to protect your assets.
What should I do if I lose my recovery seed?
Without the seed phrase, you cannot recover your wallet if the device is lost or damaged. Always keep the seed in a safe, offline location. Consider creating multiple copies stored securely.
Can I reset my hardware wallet to factory settings?
Yes, most devices have a reset option. Resetting will erase all data, including your seed phrase, so only do this if you have your recovery seed stored securely.